Manual setup
Applies to version: Version 2.x / 3.x
When you start SimpleSYN Mobile for the first time after installation, a setup wizard is started automatically, which guides you through the necessary setup steps. But it is also possible to set up SimpleSYN manually.
Basic settings
- Start SimpleSYN Mobile after installation, e.g., by double-clicking on the SimpleSYN Mobile desktop icon.
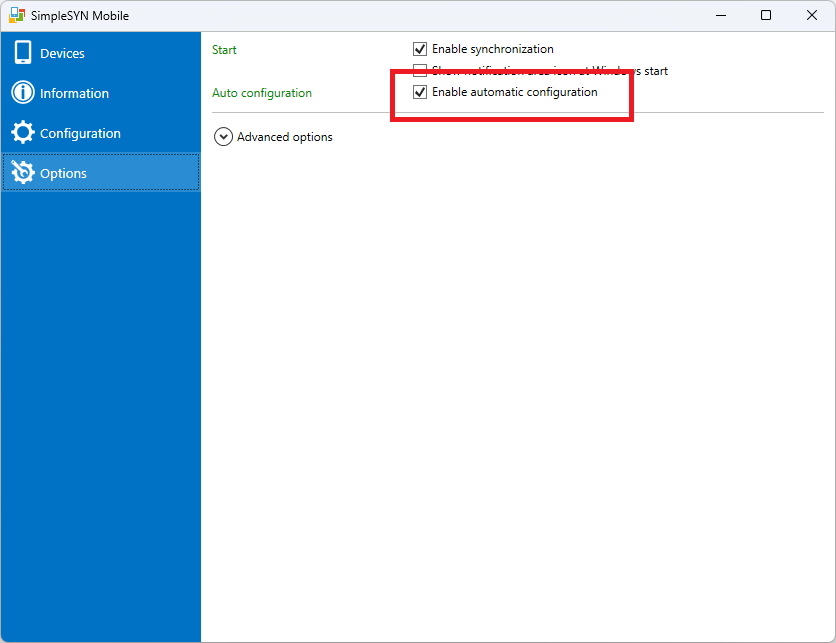
- Click on “Options” in the SimpleSYN Mobile main window.
Select the "Enable automatic configuration" checkbox.

Figure 1: Enabling automatic configuration
Set up a user account
A SimpleSYN Mobile user account must be set up before synchronization. Each Outlook data file that you want to synchronize requires its own user account.
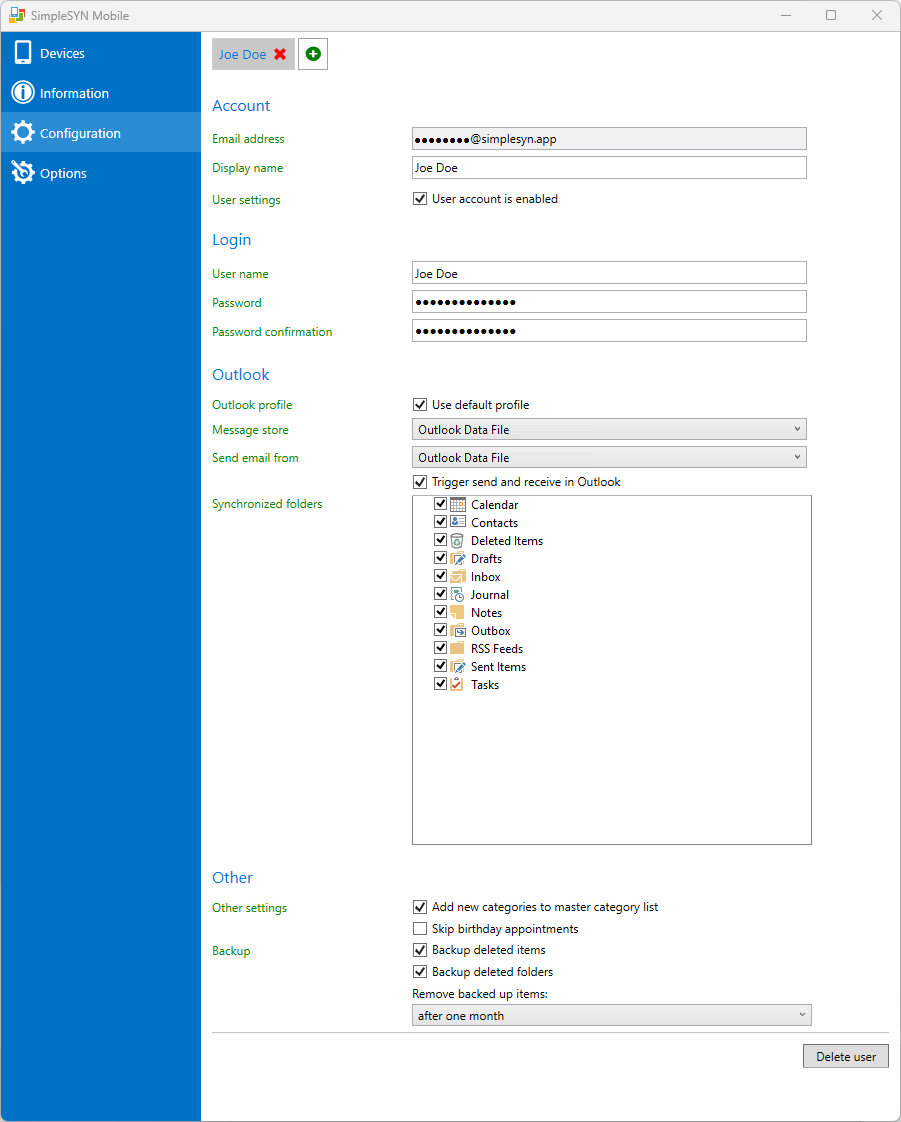
- Click on "Configuration" in the main window and click on "Click here to add a new account".
- In the “Display Name” field, type a name.
Note: The “Username” and “Email address” fields are configured automatically. Please make a note of the email address and do not change the address. - Enter a password.
Note: Make sure you are using a strong password. - Select the Outlook profile you want to synchronize. If this is not the default profile, unselect the check box “Use default profile”. A list of available profiles is then displayed.
- In "Message store", select the Outlook message store or data file that you want to synchronize (the default data file is preselected).
- In "Synchronized folders", select the Outlook folders that you want to be selectable on your smartphone for synchronization.
- In "Other settings" and "Backup", check the boxes "Add new categories to master category list”, "Backup deleted items" and "Backup deleted folders".

Figure 2: Setting up a user account
 Figure 3: The icon after the change
 Figure 4: SimpleSYN Mobile is ready again